Here we share how to Root Moto G4 Plus on Android Nougat and Install TWRP Recovery on it. As we know TWRP and Root method already available for Moto G4 Plus and we already cover that. But Moto G4 Plus updated to Android Nougat and that method no longer work on that. If you updated your Moto G4 Plus to Nougat and looking for working rooting guide , then you are in right place here we share how to Root Moto G4 Plus on Android Nougat and Install TWRP Recovery.
Thanks to the XDA Senior Member doomed151 who provide the way to Root Moto G4 Plus on Android Nougat and Install TWRP Recovery on it. The process of Moto G4 Plus root on Android Nougat is very easy all you need to follow the steps. But before you root Moto G4 Plus on Nougat, you need to unlock its bootloader (check How to Unlock Bootloader of Moto G4 Plus). So before we explain to you how to root and install TWRP recovery on Moto G4 Plus on Android Nougat, you can check why you should root your device.
Some benefits of Rooting –
- You can install custom ROM and custom kernel on your device for faster and better performance.
- Block Ads in apps with the help of ad blocker.
- Increase performance and battery life by killing background process automatically.
- After you root Android 7.0 Moto G4 Plus and install custom recovery, you can install Xposed Framework to customize your device
- You can use Titanium Backup to restore all of your apps and data.
- You can uninstall bloatware (Pre-installed Apps)
Note:-
- Rooting may void your phone warranty, and you won’t claim it back.
- Follow the steps correctly otherwise you may brick your device. We are not responsible for any damage to your phone.
- It will erase all your phone data, so we advise you first to take a complete backup of your phone and then proceed.
- Ensure that your phone has at least 50-60% charged to prevent the accidental shutdown in-between the process.
Files required to Root and Install Custom Recovery on Moto G4 Plus –
- Download ADB and fastboot driver for windows or ADB and Fastboot for Mac and install it on your PC. This will also install your device driver.
- Download and install Drivers for Moto G4 Plus
- Download TWRP 3.0.2.0 Recovery for Moto G4 Plus and place it in the folder where ADB installed and rename it to ‘recovery.img’.
- Download Phh’s superSu to root Moto G4 Plus On Android 7.0 Nougat and copy it to your phone sd card.
How to Root Moto G4 Plus on Android Nougat and Install TWRP Recovery –
Necessary Modifications
1) Download the Phh’s SuperSu from above and open it.
2) Inside that, you can find a config.txt file.
3) The default content in the file is –
eng verity crypt
Now replace/change the above file with this –
eng noverity nocrypt
4) Now save it and copy the zip file to your device.
5) Done! Now follow the below steps.
Install TWRP on Moto G4 Plus on Android Nougat–
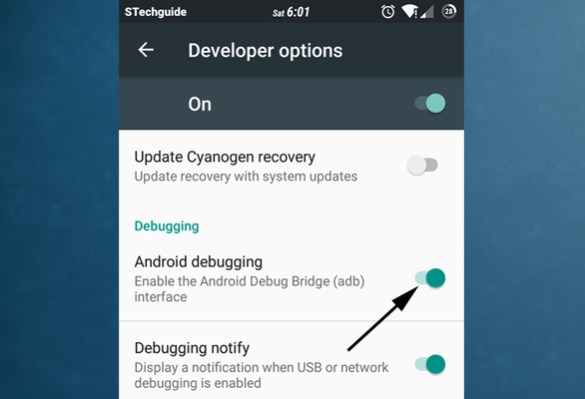
1) First enable USB debugging from setting>developer option>. To enable Developer Options, go to About phone and tap the Build Number 7 times.
2) Now go to installation directory open ADB folder and open the command window thereby pressing and hold the ‘shift’ key and right-clicked anywhere in that folder.
3) Now connect your phone to PC and reboot the device into fastboot mode by typing
adb reboot bootloader
4) You are in Fastboot mode now to check your connection by entering below command in command prompt. It will return your device serial number means your device properly connected. Check your driver if the above command is not responding.
fastboot devices
5) Type the below command correctly in command prompt and then press enter. It starts flashing recovery on your phone.
fastboot flash recovery recovery.img
6) With above command, you installed the custom recovery on Moto G4 Plus.
Root Moto G4 Plus on Android Nougat
1) To Root Moto G4 Plus on Nougat, first, download the SuperSu zip file from above.
2) Now save the SuperSu zip file to your phone.
3) Boot your device into Recovery mode (TWRP) by pressing ‘Volume Down + Power‘ button.
4) In TWRP recovery navigate to Install Zip and select ‘SuperSu.zip’ to root Moto G4 Plus on Android 7.0.
5) Swipe to install SuperSu and reboot your device. That’s it, you root G4 Plus and install custom recovery on Moto G4 Plus successfully.
So this is the complete guide to Root Moto G4 Plus on Android Nougat and Install TWRP Recovery with easy steps. If you have any questions, then comment below.
Source – XDA
The post Root Moto G4 Plus on Android Nougat and Install TWRP Recovery appeared first on STechGuide.


