Quantcast
Channel: STechGuide
Viewing all 3322 articles
Browse latest View live

Download MIUI 10.0.2.0 Global Stable ROM for Redmi 5 Plus

$
0
0

Xiaomi has started rolling out the MIUI 10 Global Stable ROM for the Redmi 5 Plus. The update is based on Latest Android 8.1 Oreo-based stable MIUI 10.0.2.0 Global Stable ROM for Redmi 5 Plus which starts rolling out via OTA. This update brings all MIUI 10 features, optimizes system performance, fixes few bugs and bring the latest security patch. Follow the below guide to Download MIUI 10.0.2.0 Global Stable ROM for Redmi 5 Plus.

MIUI 10.0.2.0 update for Redmi 5 Plus is a stable version and can only be flashed via Recovery. You can wait for the OTA or download MIUI 10.0.2.0 for Redmi 5 Plus from below to update manually. Download MIUI 10.0.2.0 Global Stable ROM for Redmi 5 Plus from below.

Download MIUI 10.0.2.0 Global Stable ROM for Redmi 5 Plus

The new update is MIUI 10.0.2.0 OEGMIFH and soon will be released and available for all users. You can Download Redmi 5 Plus MIUI 10.0.2.0 OEGMIFH ROM from below and also manually check for the update by going to Settings -> About Phone -> System updates -> Check for update. Download MIUI 10 Global Stable ROM for Redmi 5 Plus from below.

Note:-

  • This Firmware file is only for Redmi 5 Plus. Don’t try this on any other device.
  • Follow the steps correctly otherwise you may brick your device.
  • We are not responsible for any damage to your phone.
  • It may erase your data, so it is advisable to take a complete backup of your phone for safer side.
  • Ensure that your phone has at least 50-60% charged to prevent the accidental shutdown in-between the process.

Download MIUI 10.0.2.0 Global Stable ROM for Redmi 5 Plus

  • MIUI 9.6.5.0 to MIUI 10.0.2.0 OTA – Download
  • MIUI 10.0.2.0 Recovery ROM for Redmi 5 Plus – Download
  • MIUI 10.0.2.0 Fastboot ROM for Redmi 5 Plus – Download

How to Install MIUI 10 Global Stable ROM on Redmi 5 Plus –

To install MIUI 10.0.2.0 update for Redmi 5 Plus download either Recovery ROM or Fastboot ROM from above and use the below method to install this on your device.

Install MIUI 10.0.2.0 on Redmi 5 Plus (Recovery and Fastboot)

Download MIUI 10.0.2.0 Global Stable ROM for Redmi 5 Plus and flash it. Comment below if you have any doubts. Stay connected with us via FacebookTwitter, and Google Plus to read more such helpful posts.

The post Download MIUI 10.0.2.0 Global Stable ROM for Redmi 5 Plus appeared first on STechGuide.


Download OxygenOS 9.0 for OnePlus 6 (Full Rom + OTA)

$
0
0

After releasing three Open Beta updates, OnePlus finally starts rolling out the stable Android 9 Pie based OxygenOS 9.0 update for OnePlus 6. The OxygenOS 9.0 for OnePlus 6  brings latest UI changes, battery improvements, accent colour customization, Gaming Mode 3.0, and more. Download OxygenOS 9.0 for OnePlus 6 from below.

The update is rolling out via OTA (over-the-air) and many users already getting OxygenOS 9 for OnePlus 6. You can wait for the OTA updates, or you can Update Oneplus 6 to OxygenOS 9.0 manually with below method. Download OxygenOS 9.0 for OnePlus 6 from below.

Download OxygenOS 9.0 for OnePlus 6 (Full Rom + OTA)

The new Android 9 Pie based OxygenOS 9.0 for OnePlus 6 brings latest UI changes, battery improvements, accent colour customization, Gaming Mode 3.0, and more. (Check complete changelog from below). We provide you the OxygenOS 9.0 OTA file which you can flash on your device. So if you want to update your OnePlus to the latest version then Download OxygenOS 9.0 for OnePlus 6 from below. Check below what’s new in OxygenOS 9.0

OnePlus 6 OxygenOS 9.0 Features and Changelogs –

  • Updated system to Android™ 9.0 Pie™
    • Brand new UI for Android Pie
    • New adaptive battery support
    • New Android Pie gesture navigation
    • Updated Android security patch to 2018.9
    • Other new features and system improvements
  • Do Not Disturb mode
    • New Do Not Disturb (DND) mode with adjustable settings
  • New Gaming mode 3.0
    • Added text notification mode
    • Added notification for 3rd party calls
  • Accent color
    • Supported accent color customization

Note:-

  • This method is only for the OnePlus 6.
  • Full ROM can be flashed via TWRP as well.
  • Follow the steps correctly otherwise you may brick your device. We are not responsible for any damage to your phone.
  • It will not erase your data, but still, we advise you to take a complete backup of your phone and then proceed.
  • Ensure that your phone has at least 50-60% charged to prevent the accidental shutdown in-between the process.

Download OxygenOS 9.0 for OnePlus 6

  • OxygenOS 9.0 OTA for OnePlus 6 – Coming Soon (OxygenOS 5.1.11 to OxygenOS 9.0)
  • Download OxygenOS 9.0 Full ROM for OnePlus 6 – DownloadMirror

How to Install OxygenOS 9.0 Update on OnePlus 6

Method 1

1) Enable ‘USB debugging’ option from setting>developer option>. To enable Developer Options, go to About phone and tap the Build Number 7 times.

3) Download ADB and fastboot driver for windows or ADB and Fastboot for Mac and install it on your PC.

4) Download the OxygenOS 9.0 for OnePlus 6 from above Copy ROM to a folder where adb installed.

5) Now Turn Off your phone and boot into recovery mode.

3) Choose Install from ADB Sideload

4) Now Connect your phone to Laptop/PC

5) On ADB folder press shift+right click and click on open command here.

6) Now check your connection by typing the below command

adb devices

if your device is listed, you’re ready to flash the ROM

7) Flash the OxygenOS 9.0 on OnePlus 6 by typing below command

adb sideload File Name.zip

8) Once the process completes Reboot your phone.

9) Done!

Method 2

1) Download Oxygen OS 9.0 OTA zip file from above and save it on your internal phone memory.

2) Now Go to Settings > System Updates > Settings Icon > Local Upgrade & Select the OTA File.

3) Select upgrade now when the system prompts.

4) Your device will now reboot into stock recovery and flash the OTA.

5) The installer will flash the OTA itself and reboot the device.

6) Done.

That’s all this is the complete guide to Download OxygenOS 9.0 for OnePlus 6. Have any questions? Do let us know that in the comments below. Stay connected with us via FacebookTwitter, and Google Plus to read more such helpful posts.

OxygenOS 9.0

Source

The post Download OxygenOS 9.0 for OnePlus 6 (Full Rom + OTA) appeared first on STechGuide.

Download Magisk v17.2 (Magisk Manager 6.0.0)

$
0
0

Today we share a link to Download Magisk v17.2 and Latest Magisk Manager 6.0.0 for Android. XDA developer topjohnwu release the new version of Magisk v17.2 which adds obfuscation for PS4 Remote Play, workaround for Fate/Grand Order, and more. Download Magisk v17.2 and Magisk Manager v6.0.0 from below.

If you already have Magisk installed, to update you just need to download the latest version Magisk Manager 6.0.0 APK and update things inside the app. You may also need to re-toggle Magisk Hide before SafetyNet inquiries are passed. Download Magisk v17.2 for Android from below.

Download Magisk v17.2

Magisk packs with a super powerful Universal Systemless Interface for Android which is aimed to make custom mods go systemless. Magisk is similar to Systemless root by Chainfire which allowed users to get root access without modifying the system partition. Both apps are allowing uninterrupted installation for OTA updates even when the device is Rooted. But Magisk gives you more controls and Installing systemless root via Magisk also allows you to use Android Pay with root. Check the below guide to Download and Install Magisk v17.2 on Android right now.

Magisk 17.2 Features and Changelogs

  • v17.2
    – [ResetProp] Update to AOSP upstream to support serialized system properties
    – [MagiskInit] Randomize Magisk service names to prevent detection (e.g. FGO)
    – [MagiskSU] New communication scheme to communicate with Magisk Manager

Magisk Manager 6.0.0 Features and Changelogs –

  • v6.0.0
    – Update to latest AndroidX support library
    – Fix crashes when online repos contain incomplete metadata
    – Optimize BootSigner to use as little memory as possible, prevent OutOfMemoryError
    – Support new communication scheme between Magisk v17.2 and Magisk Manager
    – Enable excessive obfuscation to prevent APK analysis root detections (still not 100% obfuscated due to backwards compatibility with stable channel)

Note:-

  • Installing Magisk on Android required Unlocked Bootloader.
  • You must have working TWRP Recovery Installed on your device.
  • Follow the steps correctly otherwise you may brick your device.
  • It may erase your data, so it is advisable to take a complete backup of your phone for safer side.
  • Ensure that your phone has at least 50-60% charged to prevent the accidental shutdown in-between the process.

Download Magisk v17.2 and Magisk Manager 6.0.0 for Android

  • Download Magisk 17.2 zip file – Download
  • Download Magisk Manager 6.0.0 apk – Download

How to Install Magisk v17.2 on Android Phones

Installing Magisk on your device is very simple all you have to Download Magisk 17.2 from above and flash it via TWRP. If you already have Magisk installed, to update you just need to download the latest version Magisk Manager APK and update things inside the app.

How to Install Magisk 17.2 on Android

Download Magisk v17.2 and Magisk Manager 6.0.0 and share. For any related queries comment below. Stay connected with us via FacebookTwitter, and Google Plus to read more such helpful posts.

Source

The post Download Magisk v17.2 (Magisk Manager 6.0.0) appeared first on STechGuide.

Download LG G5 Android 8.0 Oreo KDZ (Verizon and T-Mobile)

$
0
0

Good news for LG G5 Users, Latest Android 8.0 Oreo update for LG G5 is start rolling out for Verizon and T-Mobile users. The Android 8.0 Oreo update for LG G5 is rolling out via OTA with new features and latest security patches. If you want to Install Oreo 8.0 on LG G5 or want to Update LG G5 to Android 8.0 Oreo Manually then you are in right place. Download LG G5 Android 8.0 Oreo KDZ for Verizon and T-Mobile from below and install it manually.

LG G5 Oreo build brings all Android Oreo Features along with many new features and latest security patch. Here we share the LG G5 Oreo Firmware file with that you can easily install Oreo on LG G5 manually. Follow below guide to Download and Install Android 8.0 Oreo On LG G5.

Download LG G5 Android 8.0 Oreo KDZ (Verizon and T-Mobile)

The update is a stable oreo build and soon will roll out via OTA for all users. We got T-Mobile LG G5 Oreo KDZ and TWRP Flashable zip. The Verizon LG G5 Oreo kdz file is not available for now but we’ll update this post as soon as its available. Download LG G5 Android 8.0 Oreo KDZ (Verizon and T-Mobile) from below to update LG G5 to Android Oreo manually.

Note:-

  • This Firmware file is only for LG G5 (T-Mobile and Verizon). Don’t try this on any other device.
  • Follow the steps correctly otherwise you may brick your device.
  • We are not responsible for any damage to your phone.
  • It may erase your data so it is advisable to take a complete backup of your phone for safer side.
  • Ensure that your phone has at least 50-60% charged to prevent the accidental shutdown in-between the process.

Download LG G5 Android 8.0 Oreo KDZ Firmware

  1. Download Latest LGUP Tool for LG G5 – Download
  2. Uppercut and extract the downloaded ZIP on the PC – Download
  3. Download T-Mobile LG G5 Oreo KDZ File H330 – Download
  4. T-Mobile LG G5 Android 8.0 Oreo TWRP Flashable Zip – Download
  5. Download Verizon LG G5 Oreo KDZ File – Coming Soon

How to Install Android 8.0 Oreo On LG G5 –

Flash LG G5 Oreo KDZ file – 

  1. First, download the LGUP Tool and LG G5 Oreo KDZ ROM from above and extract it.
  2. Install the LGUP on your PC.
  3. Launch LG UP tool via Uppercut by double-clicking on the ‘UPPERCUT_1.0.0.0.exe’ file.
  4. Connect the LG phone to the PC using the USB cable
  5. Turn OFF device and boot into Download Mode by Hold Volume Up while plugging in the USB cable.
  6. Now in LGUP, click on Upgrade option choose the file’s path and locate the KDZ file and select it.
  7. Now click on the Start button to start the process.
  8. Wait until the process complete.
  9. After successful completion perform a factory reset (Optional).
  10. Done! You have successfully Update LG G5 to Oreo.

Flash LG G5 Oreo TWRP Flashable zip – 

  1. First, download and install a custom recovery. If you already had a custom recovery installed on your device then skip this step.
  2. Download LG G5 Andriod 8.0 Oreo Flashable zip rom above and save it on your device.
  3. Now Boot your device into Recovery mode.
  4. Now in TWRP, create a Nandroid backup (Recommended) of your device for safer side, if anything goes wrong.
  5. Now do a Factory Reset by Goto Wipe>Advanced Wipe>Select Wipe cache, Dalvik cache, System, and data and swipe to confirm it.
  6. Now, Go to Install and locate the ROM zip file & swipe to Install the ROM file.
  7. Now wipe cache & Dalvik cache again and Reboot your device.
  8. Done!

This is the easiest way to Download LG G5 Android 8.0 Oreo KDZ (Verizon and T-Mobile) and flash it manually. If you have any questions, comment below.

Source

The post Download LG G5 Android 8.0 Oreo KDZ (Verizon and T-Mobile) appeared first on STechGuide.

Download Huawei Mate 20 Stock Wallpapers and Live Wallpapers

$
0
0

Today we provide you the complete set of Huawei Mate 20 stock wallpapers. Huawei Mate 20 is an upcoming Huawei flagship device which will launch very soon. Most probably Huawei launched the thee variant Huawei Mate 20, Huawei Mate 20 Lite and Huawei Mate 20 Pro. Huawei Mate 20 stock wallpapers and Live Wallpapers are already out and you don’t have to wait until the launch event to grab the wallpaper.

The Stock Wallpapers of Huawei Mate 20 have now been available to us and we are going to share them with you below. The phone comes with 14 beautiful wallpapers which look pretty good on your device. So we shared all Huawei Mate 20 stock wallpapers and Live Wallpapers which you can download it from the bottom of the page.

Download Huawei Mate 20 Stock Wallpapers and Live Wallpapers

Huawei Mate 20 sports a 6.4-inch FHD display with a resolution of 1080×2244 pixels. Huawei Mate 20 powered by a Hisilicon Kirin 980 processor with 6/8GB of RAM and 128/256GB internal storage. The phone will run on company’s latest EMUI 9.0 OS and comes with a 4200 mAh battery. Download Huawei Mate 20 stock wallpapers from below.

Huawei Mate 20 will have Dual back camera while Huawei Mate 20 Pro has three camera setup. To make the display of the phone look stunning Huawei Mate 20 comes with a beautiful set of HD wallpapers. You can download these beautiful and colorful Huawei Mate 20 wallpapers and use it on any Android device. Check out Stock Wallpapers of Huawei Mate 20.

Huawei Mate 20 Stock Wallpapers are available in 2160×2244  pixels which looks beautiful on any Android phone. The Huawei Mate 20 comes with 14 stunning High-Resolution wallpapers. You can download a zip file containing all stock wallpapers of Huawei Mate 20 in FHD resolution.

All the wallpaper shown below samples are compressed and resized to fit here. You can download all stock wallpapers of Huawei Mate 20 in 2160×2244  Resolution from the link below. Also, check out our Stock Wallpaper Section.

Download Huawei Mate 20 Stock Wallpapers and Live Wallpapers

  • Stock Wallpapers of Huawei Mate 20 – Download
  • Huawei Mate 20 Live Wallpapers – Download (Install as normal apk)

These are the stunning and beautiful Huawei Mate 20 and Huawei Mate 20 Pro Stock Wallpapers and Live Wallpapers. Download these beautiful and colorful Huawei Mate 20 Wallpapers and share it with your friends.

Wallpaper Samples –

Huawei Mate 20 Wallpaper Huawei Mate 20 Wallpaper Huawei Mate 20 Wallpaper Huawei Mate 20 Wallpaper Huawei Mate 20 Wallpaper Huawei Mate 20 Wallpaper Huawei Mate 20 Wallpaper Huawei Mate 20 Wallpaper Huawei Mate 20 Wallpaper Huawei Mate 20 Wallpaper Huawei Mate 20 Wallpaper Huawei Mate 20 Wallpaper Huawei Mate 20 Wallpaper Huawei Mate 20 Wallpaper

Source

The post Download Huawei Mate 20 Stock Wallpapers and Live Wallpapers appeared first on STechGuide.

Download Huawei Mate 20 Themes for all Huawei and Honor Devices

$
0
0

Today we share a link to Download Huawei Mate 20 Themes for all Huawei and Honor Devices. Huawei Mate 20 is an upcoming Huawei flagship device which will launch on October 16th. The phone is not launched yet but we grabbed some pre-built Mate 20 themes. If you are a Huawei or Honor user, then this theme is just right for you. Here we share a direct link to Download Huawei Mate 20 Themes.

The Huawei Mate 20 Stock themes tested on Huawei Mate 9 and Huawei Mate 10 Pro running EMUI 8. You can Download Huawei Mate 20 Themes for Huawei/Honor Devices from below and install it manually. Also, check Huawei Mate 10 themes for EMUI devices

Download Huawei Mate 20 Themes for all Huawei and Honor Devices

The theme is already tested on many devices and it may work on almost all devices who running on EMUI 8.0. We previously shared Galaxy S8 ThemeHonor v10 Themes and now we come with a new theme from Mate 20. This is a .HWT theme file which replaces the stock theme file with this new Huawei Mate 20 hwt theme file. You can Download Huawei Mate 20 stock theme for EMUI Devices from below.

Latest Stock themes from Huawei Mate 20 is very beautiful and colorful and it works on any device running on EMUI 8 or above. We share a file which contains 12 Huawei Mate 20 themes. You can extract the zip file and install any theme you like. Download Huawei Mate 20 Stock Themes from below.

Download Huawei Mate 20 Themes for all EMUI Devices –

  • Huawei Mate 20 Themes for all Huawei and Honor devices – Download
  • Huawei Mate 20 Stock and Live Wallpapers – Download

How to Install Huawei Mate 20 Themes on Huawei/Honor Devices –

  1. Download the Huawei Mate 20 Theme ZIP file from above and unzip it
  2. Now place the .hwt file in HWThemes folder.
  3. Now apply it from Themes app.
  4. Restart your phone
  5. Done!

So if you want to look your phone like Huawei Mate 20 then Download Huawei Mate 20 Theme for EMUI Devices and enjoy the theme. Stay connected with us via FacebookTwitter, and Google Plus to read more such helpful posts. Check our Theme Section for more awesome themes.

Theme Screenshots –

Mate 20 Themes

Mate 20 Themes

Source

The post Download Huawei Mate 20 Themes for all Huawei and Honor Devices appeared first on STechGuide.

Download Google Pixel 3 Stock Wallpapers & Live Wallpapers

$
0
0

Today we provide you the complete set of Google Pixel 3 Stock Wallpapers & Live Wallpapers. Like any other device, this device will also come with beautiful wallpapers and the good news is that you don’t have to wait until the launch event to grab the wallpaper. The new stock wallpaper of Google Pixel 3, which will supposedly come pre-loaded on the device is now available for download. Download Google Pixel 3 Stock Wallpapers & Live Wallpapers from below.

The Stock Wallpapers of Google Pixel 3 have now been available to us and we are going to share them with you below. Also XDA Recognized Developer Pranav Pandey has ported the Google Pixel 3 Live Wallpapers app which will work on any device running on Android 6.0 Marshmallow and above. The phone comes with 28 beautiful wallpapers which look pretty good on your device. So we shared all Google Pixel 3 stock wallpapers and Live Wallpapers which you can download it from the bottom of the page.

Download Google Pixel 3 Stock Wallpapers & Live Wallpapers

Google Pixel 3 will sport a 5.5-inch FHD+ display with a resolution of 1080×2160 pixels. Google Pixel 3 powered by a Kryo 385 processor with 4/6GB of RAM and 128/256GB internal storage. The phone will run on company’s latest Android 9 Pie OS and comes with a 2915 mAh battery. Download Google Pixel 3 stock wallpapers from below.

Most of the Google Pixel 3 Stock Wallpapers have a full HD resolution which is 1080 x 1920 pixels while some have a resolution of 2880 x 2880 px. The Google Pixel 3 comes with 28 stunning High-Resolution wallpapers. You can download a zip file containing all stock wallpapers of Google Pixel 3 in FHD resolution.

All the wallpaper shown below samples are compressed and resized to fit here. You can download all stock wallpapers of Google Pixel 3 in full Resolution from the link below. Also, check out our Stock Wallpaper Section.

Download Google Pixel 3 Stock Wallpapers and Live Wallpapers

  • Stock Wallpapers of Google Pixel 3 – Download, Mirror
  • Google Pixel 3 Live Wallpapers for Android 6.0 – Android 7.1 – Download, Mirror
  • Google Pixel 3 Live Wallpapers for Android 8.0 – Android 8.1 – Download, Mirror
  • Google Pixel 3 Live Wallpapers for Android 9 Pie – Download

These are the stunning and beautiful Google Pixel 3 Stock Wallpapers and Live Wallpapers. Download these beautiful and colorful Google Pixel 3 Wallpapers and share it with your friends.

Wallpaper Samples –

Google Pixel 3 Stock Wallpapers Google Pixel 3 Stock Wallpapers Google Pixel 3 Stock Wallpapers

Source

The post Download Google Pixel 3 Stock Wallpapers & Live Wallpapers appeared first on STechGuide.

Download OxygenOS 5.0.6 for OnePlus 3 and OnePlus 3T

$
0
0

Latest Oreo-based OxygenOS 5.0.6 update for OnePlus 3 and OnePlus 3T starts rolling out. The OxygenOS 5.0.6 is a minor update which fixes general bugs and brings system improvements and brings September security patch. Download OxygenOS 5.0.6 for OnePlus 3 and OnePlus 3T from below.

The update is rolling out via OTA (over-the-air) and many users already getting OxygenOS 5.0.6 for OnePlus 3T. The update is incremental and rolls out in phase wise manner. You can wait for the OTA updates, or you can Update Oneplus 3/3T to OxygenOS 5.0.6 Oreo manually with below method. Download OxygenOS 5.0.6 for OnePlus 3 and OnePlus 3T from below.

Download OxygenOS 5.0.6 for OnePlus 3 and OnePlus 3T

The new OxygenOS 5.0.6 for OnePlus 3T and OnePlus 3 fixes general bugs and brings system improvements. (Check the complete changelogs from below). We provide you the OxygenOS 5.0.6 OTA file which you can flash on your device. So if you want to update your OnePlus to the latest version then Download OxygenOS 5.0.6 for OnePlus 3 and OnePlus 3T from below. Check below what’s new in OxygenOS 5.0.6

OxygenOS 5.0.6 Features and Changelogs –

  • System
    • Updated Android security patch to 2018.9
    • General bug fixes and improvements

Note:-

  • This method is only for the OnePlus 3 and OnePlus 3T.
  • Full ROM can be flashed via TWRP as well.
  • Follow the steps correctly otherwise you may brick your device. We are not responsible for any damage to your phone.
  • It will not erase your data, but still, we advise you to take a complete backup of your phone and then proceed.
  • Ensure that your phone has at least 50-60% charged to prevent the accidental shutdown in-between the process.

Download OxygenOS 5.0.6 for OnePlus 3 and OnePlus 3T

  • OxygenOS 5.0.6 update for OnePlus 3 OTA link – Coming Soon (OxygenOS 5.0.5 to OxygenOS 5.0.6)
  • OxygenOS 5.0.6 Full ROM for OnePlus 3 – Download
  • OxygenOS 5.0.6 OTA for OnePlus 3T – Coming Soon (OxygenOS 5.0.5 to OxygenOS 5.0.6)
  • OxygenOS 5.0.6 Full ROM for OnePlus 3T – Download 

How to Install OxygenOS 5.0.6 Update on OnePlus 3 and OnePlus 3T

Method 1

1) Enable ‘USB debugging’ option from setting>developer option>. To enable Developer Options, go to About phone and tap the Build Number 7 times.

3) Download ADB and fastboot driver for windows or ADB and Fastboot for Mac and install it on your PC.

4) Download the OxygenOS 5.0.6 for OnePlus 3 and OnePlus 3T from above Copy ROM to a folder where adb installed.

5) Now Turn Off your phone and boot into recovery mode.

3) Choose Install from ADB Sideload

4) Now Connect your phone to Laptop/PC

5) On ADB folder press shift+right click and click on open command here.

6) Now check your connection by typing the below command

adb devices

if your device is listed, you’re ready to flash the ROM

7) Flash the Oxygen OS 5.0.6 on OnePlus 3 and OnePlus 3T by typing below command

adb sideload File Name.zip

8) Now wait until the process complete and then Reboot the phone.

9) Done!

Method 2

1) Download OxygenOS 5.0.6 OTA zip file from above and save it on your internal phone memory.

2) Now Switch off your device and boot into the Recovery mode.

3) To boot OnePlus 3 into recovery mode press and hold ‘Power + Volume Down’ button.

4) Now your phone boot into the Stock recovery.

5) Now Select ‘Apply Update’ and select ‘Choose from Internal Storage

6) Browse the OTA zip file which you download and save on your phone before.

6) Select the zip file, and it will Install OxygenOS 5.0.6 OTA update file on your OnePlus 3/3T.

7) Now wait until the process complete and then reboot your device.

8) Done.

That’s all this is the complete guide to Download OxygenOS 5.0.6 for OnePlus 3 and OnePlus 3T (OTA + Full ROM). Have any questions? Do let us know that in the comments below. Stay connected with us via FacebookTwitter, and Google Plus to read more such helpful posts.

Source

The post Download OxygenOS 5.0.6 for OnePlus 3 and OnePlus 3T appeared first on STechGuide.


Download MIUI 10.0.1.0 Global Stable ROM for Redmi 6

$
0
0

Xiaomi has started rolling out the MIUI 10 Global Stable ROM for the Redmi 6. The update is based on Latest Android 8.1 Oreo-based stable MIUI 10.0.1.0 Global Stable ROM for Redmi 6 which starts rolling out via OTA. This update brings all MIUI 10 features, optimizes system performance, fixes few bugs and bring the latest security patch. Follow the below guide to Download MIUI 10.0.1.0 Global Stable ROM for Redmi 6.

MIUI 10.0.1.0 update for Redmi 6 is a stable version and can only be flashed via Recovery. You can wait for the OTA or download MIUI 10.0.1.0 for Redmi 6 from below to update manually. Download MIUI 10.0.1.0 Global Stable ROM for Redmi 6 from below.

Download MIUI 10.0.1.0 Global Stable ROM for Redmi 6

The new update is MIUI 10.0.1.0 OCGMIFH and soon will be released and available for all users. You can Download Redmi 6 MIUI 10.0.1.0 OCGMIFH ROM from below and also manually check for the update by going to Settings -> About Phone -> System updates -> Check for update. Download MIUI 10 Global Stable ROM for Redmi 6 from below.

Note:-

  • This Firmware file is only for Redmi 6. Don’t try this on any other device.
  • Follow the steps correctly otherwise you may brick your device.
  • We are not responsible for any damage to your phone.
  • It may erase your data, so it is advisable to take a complete backup of your phone for safer side.
  • Ensure that your phone has at least 50-60% charged to prevent the accidental shutdown in-between the process.

Download MIUI 10.0.1.0 Global Stable ROM for Redmi 6

  • MIUI 10.0.1.0 Recovery ROM for Redmi 6 – Download
  • MIUI 10.0.1.0 Fastboot ROM for Redmi 6 – Download

How to Install MIUI 10 Global Stable ROM on Redmi 6 –

To install MIUI 10.0.1.0 update for Redmi 6 download either Recovery ROM or Fastboot ROM from above and use the below method to install this on your device.

Install MIUI 10.0.1.0 on Redmi 6 (Recovery and Fastboot)

Download MIUI 10.0.1.0 Global Stable ROM for Redmi 6 and flash it. Comment below if you have any doubts. Stay connected with us via FacebookTwitter, and Google Plus to read more such helpful posts.

The post Download MIUI 10.0.1.0 Global Stable ROM for Redmi 6 appeared first on STechGuide.

Download MIUI 10.0.2.0 Global Stable ROM for Redmi 6A

$
0
0

Xiaomi has started rolling out the MIUI 10 Global Stable ROM for the Redmi 6A. The update is based on Latest Android 8.1 Oreo-based stable MIUI 10.0.2.0 Global Stable ROM for Redmi 6A which starts rolling out via OTA. This update brings all MIUI 10 features, optimizes system performance, fixes few bugs and bring the latest security patch. Follow the below guide to Download MIUI 10.0.2.0 Global Stable ROM for Redmi 6A.

MIUI 10.0.2.0 update for Redmi 6A is a stable version and can only be flashed via Recovery. You can wait for the OTA or download MIUI 10.0.2.0 for Redmi 6A from below to update manually. Download MIUI 10.0.2.0 Global Stable ROM for Redmi 6A from below.

Download MIUI 10.0.2.0 Global Stable ROM for Redmi 6A

The new update is MIUI 10.0.2.0 OCBMIFH and soon will be released and available for all users. You can Download Redmi 6A MIUI 10.0.2.0 OCBMIFH ROM from below and also manually check for the update by going to Settings -> About Phone -> System updates -> Check for update. Download MIUI 10 Global Stable ROM for Redmi 6A from below.

Note:-

  • This Firmware file is only for Redmi 6A. Don’t try this on any other device.
  • Follow the steps correctly otherwise you may brick your device.
  • We are not responsible for any damage to your phone.
  • It may erase your data, so it is advisable to take a complete backup of your phone for safer side.
  • Ensure that your phone has at least 50-60% charged to prevent the accidental shutdown in-between the process.

Download MIUI 10.0.2.0 Global Stable ROM for Redmi 6A

  • MIUI 10.0.2.0 Recovery ROM for Redmi 6A – Download
  • MIUI 10.0.2.0 Fastboot ROM for Redmi 6A – Download

How to Install MIUI 10 Global Stable ROM on Redmi 6A –

To install MIUI 10.0.2.0 update for Redmi 6A download either Recovery ROM or Fastboot ROM from above and use the below method to install this on your device.

Install MIUI 10.0.2.0 on Redmi 6A (Recovery and Fastboot)

Download MIUI 10.0.2.0 Global Stable ROM for Redmi 6A and flash it. Comment below if you have any doubts. Stay connected with us via FacebookTwitter, and Google Plus to read more such helpful posts.

The post Download MIUI 10.0.2.0 Global Stable ROM for Redmi 6A appeared first on STechGuide.

Download MIUI 9.6.3.0 Global Stable ROM for Redmi Note 4/4x

$
0
0

Latest MIUI 9.6.3.0 Global Stable ROM for Redmi Note 4/4x starts rolling out. The new MIUI 9.6.3.0 update fixes many bugs and improves system stability. MIUI 9.6.3.0 Update for Redmi Note 4/4x is out and you can install it manually. Follow the below guide to Download MIUI 9.6.3.0 Global Stable ROM for Redmi Note 4.

MIUI 9.6.3.0 Global Stable ROM for Redmi Note 4/4x rolling out via OTA and users will get the update soon. You can wait for the OTA or download MIUI 9.6.3.0 for Redmi Note 4/4x from below to update manually. Download MIUI 9.6.3.0 Global Stable ROM for Redmi Note 4 from below.

Download MIUI 9.6.3.0 Global Stable ROM for Redmi Note 4/4x

The new update is MIUI 9.6.3.0 NCFMIFD and rolled out via OTA (over-the-air), and users will receive the Notification pop up once the update is ready for download and install. You can Download Redmi Note 4 MIUI 9.6.3.0 NCFMIFD ROM from below and also manually check for the update by going to Settings -> About Phone -> System updates -> Check for the update. Download MIUI 9.6.3.0 Stable ROM for Redmi Note 4 from below.

Download MIUI 9.6.3.0 Global Stable ROM for Redmi Note 4/4x

  • MIUI 9.6.3.0 Recovery ROM for Redmi Note 4 – Download
  • MIUI 9.6.3.0 Fastboot ROM for Redmi Note 4 – Download

How to Install MIUI 9.6.3.0 Global Stable ROM on Redmi Note 4 –

To install MIUI 9.6.3.0 update for Redmi Note 4 download either Recovery ROM or Fastboot ROM from above and use the below method to install this on your device.

Install MIUI 9.6.3.0 on Redmi Note 4/4x (Recovery and Fastboot)

Download MIUI 9.6.3.0 Global Stable ROM for Redmi Note 4 and flash it on your device. Comment below if you have any doubts. Stay connected with us via FacebookTwitter, and Google Plus to read more such helpful posts.

The post Download MIUI 9.6.3.0 Global Stable ROM for Redmi Note 4/4x appeared first on STechGuide.

Download MIUI 9.6.5.0 Global Stable ROM for Redmi 4x

$
0
0

Good news for Redmi 4x users, latest MIUI 9.6.5.0 Global Stable ROM for Redmi 4x starts rolling out. The new MIUI 9 features include Image Search, Smart Assistant, Smart App Launcher, and Performance Enhancements. MIUI 9.6.5.0 Update for Redmi 4x is out and you can install it manually. Follow the below guide to Download MIUI 9.6.5.0 Global Stable ROM for Redmi 4x.

MIUI 9.6.5.0 update for Redmi 4x rolling out via OTA and users will get the update soon. You can wait for the OTA or download MIUI 9.6.5.0 for Redmi 4x from below to update manually. Download MIUI 9.6.5.0 Global Stable ROM for Redmi 4x from below.

Download MIUI 9.6.5.0 Global Stable ROM for Redmi 4x

The new update is MIUI 9.6.5.0 NAMMIFD and rolled out via OTA (over-the-air), and users will receive the Notification pop up once the update is ready for download and install. You can Download Redmi 4x MIUI 9.6.5.0 NAMMIFD ROM from below and also manually check for the update by going to Settings -> About Phone -> System updates -> Check for update. Download MIUI 9.6.5.0 Stable ROM for Redmi 4x from below.

Download MIUI 9.6.5.0 Global Stable ROM for Redmi 4x

  • MIUI 9.6.5.0 Recovery ROM for Redmi 4x – Download
  • MIUI 9.6.5.0 Fastboot ROM for Redmi 4x – Download

How to Install MIUI 9.6.5.0 Global Stable ROM on Redmi 4x –

To install MIUI 9.6.5.0 update for Redmi 4x download either Recovery ROM or Fastboot ROM from above and use the below method to install this on your device.

Install MIUI 9.6.5.0 on Redmi 4x (Recovery and Fastboot)

Download MIUI 9.6.5.0 Global Stable ROM for Redmi 4x and flash it. Comment below if you have any doubts related to this post. Stay connected with us via FacebookTwitter, and Google Plus to read more such helpful posts.

The post Download MIUI 9.6.5.0 Global Stable ROM for Redmi 4x appeared first on STechGuide.

Download MIUI 9.6.2.0 Global Stable ROM for Redmi Note 3

$
0
0

Good news for Redmi Note 3 users, latest MIUI 9.6 Global Stable ROM for Redmi Note 3 starts rolling out. The new MIUI 9 features include Image Search, Smart Assistant, Smart App Launcher, and Performance Enhancements. MIUI 9.6.2.0 Update for Redmi Note 3 is out and you can install it manually. Follow the below guide to Download MIUI 9.6.2.0 Global Stable ROM for Redmi Note 3.

MIUI 9.6 update for Redmi Note 3 rolling out via OTA and users will get the update soon. You can wait for the OTA or download MIUI 9.6.2.0 for Redmi Note 3 from below to update manually. Download MIUI 9.6.2.0 Global Stable ROM for Redmi Note 3 from below.

Download MIUI 9.6.2.0 Global Stable ROM for Redmi Note 3

The new update is MIUI 9.6.2.0 MHOMIFD and rolled out via OTA (over-the-air), and users will receive the Notification pop up once the update is ready for download and install. You can Download Redmi Note 3 MIUI 9.6.2.0 MHOMIFD ROM from below and also manually check for the update by going to Settings -> About Phone -> System updates -> Check for update. Download MIUI 9.6.2.0 Stable ROM for Redmi Note 3 from below.

Download MIUI 9.6.2.0 Global Stable ROM for Redmi Note 3

  • MIUI 9.6.2.0 Global Stable ROM for Redmi Note 3 – Recovery ROM
  • MIUI 9.6.2.0 Global Stable ROM for Redmi Note 3 – Fastboot ROM

How to Install MIUI 9.6.2.0 Global Stable ROM on Redmi Note 3 –

To install MIUI 9.6.2.0 update for Redmi Note 3 download either Recovery ROM or Fastboot ROM from above and use the below method to install this on your device.

Install MIUI 9.6.2.0 on Redmi Note 3 (Recovery and Fastboot)

Download MIUI 9.6.2.0 Global Stable ROM for Redmi Note 3 and flash it. Comment below if you have any doubts. Stay connected with us via FacebookTwitter, and Google Plus to read more such helpful posts.

The post Download MIUI 9.6.2.0 Global Stable ROM for Redmi Note 3 appeared first on STechGuide.

How to Unlock Bootloader of Nokia 8 Officially

$
0
0

Finally, Nokia will allow customers to officially unlock the bootloader of their devices. Now with a few simple steps, you can Unlock Bootloader of Nokia 8. If you decide to flash a ROM, root your phone, or to install a custom recovery, then you need to unlock the bootloader of Nokia 8 first. But you should be warned that unlocking Nokia 8 bootloader may void its warranty. Follow the below guide to Unlock Bootloader of Nokia 8.

If you’re planning to install a custom ROM or want to root your phone, you have to unlock the bootloader of Nokia 8 first. Once you unlock Nokia 8 bootloader, you can root and install a custom recovery on your phone. So here is the step by step guide with the help of that you can quickly unlock bootloader of Nokia 8. Read the below note carefully before you unlock the bootloader of Nokia 8.

How to Unlock Bootloader of Nokia 8 Officially

Unlocking Nokia 8 Bootloader is a two-step process, first, validate your phone for unlocking, get device-specific ‘unlock.key’ from Nokia, and then flash the key via fastboot to unlock Nokia 8 bootloader. For unlocking the bootloader of your Nokia 8 you need to follow below steps.

Note:-

  • Follow the steps correctly otherwise you may brick your device. We are not responsible for any damage to your phone.
  • It will erase all your personal data including data of internal storage, so we advise you first to take a complete backup of your phone and then proceed.
  • Ensure that your phone has at least 50-60% charged to prevent the accidental shutdown in-between the process.

How to unlock bootloader of Nokia 8 –

Step 1 –

  1. Download Nokia Bootloader Unlocker app APK file on your Nokia 8
  2. Install and Launch the Bootloader Unlocker app.
  3. Now fill the required email information and tap on Submit.
  4. You will see validation code appears on the screen (Note it down)
  5. Now, go to the Nokia bootloader unlock page. Sign in with your Nokia account (or Sign up if you don’t have an account).
  6. Enter the validation code and email address you used to get the validation code.
  7. You will get the unlock-key file for your Nokia 8 on your email address.

Step 2 –

  1. First, enable ‘USB debugging’ and OEM Unlock’ option from setting>developer option>. To enable Developer Options, go to About phone and tap the Build Number 7 times.
  2.  Install the ADB and fastboot driver for windows or ADB and Fastboot for Mac and then restart if you already have the driver installed then skip this step.
  3. After installation of the driver, you can see a folder named ADB in your installation directory. Enter the folder, and you find four files including ADB and fastboot.exe.fastboot
  4. Download the unlock-key file you have received on your email and save it where ADB is installed
  5. Now press and hold ‘shift’ key and right-click anywhere in the folder and select ‘Open command window here’.fastboot cmd
  6. Now connect your device to PC and enter into the Download mode. To enter the Download mode of Nokia 8, switch off the device While keep pressing the Volume Down button, connect the phone to your computer via a USB cable or type the below command.
    adb reboot bootloader
  7. You are in a Fastboot mode now to check your connection by entering below command in command prompt. It will return your device serial number means your device properly connected. Check your driver if the above command is not responding.
    fastboot devices
    How to unlock bootloader of nexus 6p
  8. To unlock bootloader of Nokia 8, go to the command line and type below command. It will only take seconds to complete the process.
    fastboot flash unlock unlock.key
    fastboot oem unlock
  9. Above step will unlock the Nokia 8 bootloader. Now your device will reboot.

This is the complete guide on how to unlock bootloader of Nokia 8. If you have any doubt related to above process comment below. Stay connected with us via FacebookTwitter, and Google Plus to read more such helpful posts.

The post How to Unlock Bootloader of Nokia 8 Officially appeared first on STechGuide.

Install Android 9 Pie on Honor View 10 (EMUI 9 for Honor View 10)

$
0
0

Good news for Honor View 10 users, Android 9 Pie update for Honor View 10 is now available. The EMUI 9.0 beta rollout has already begun and you can sign up for Huawei Beta Program but not everyone gets the updates. That’s why we share a guide to Download and Install Android 9 Pie on Honor View 10 (EMUI 9 for Honor View 10).

The Android Pie for Honor View 10 brings EMUI 9 and brings all Android Pie features. Here we shared Honor View 10 Android Pie firmware files and method to update Honor View 10 to Android 9 Pie. The update is available for Honor View 10 variants (BKL-L09). Download EMUI 9.0 for Honor View 10 from below.

Install Android 9 Pie on Honor View 10 (EMUI 9 for Honor View 10)

There is two method to get Android Pie on your device either install Android Pie OTA Updates or Download Android 9 Pie Firmware for Honor View 10 and flash it manually. If you want to install it via OTA then you have to wait for more time and if you want to install it manually then download Android 9 Pie Firmware for Honor View 10 from below. Follow below guide to Download and Install Android 9 Pie on Honor View 10.

Note – 

  • This method will work only on Honor View 10.
  • You need an Unlocked bootloader and Rooted device.
  • The method we share is not the official one so try it at your own risk.
  • Follow the steps correctly otherwise you may brick your device. We are not responsible for any damage to your phone.
  • It may erase your data so it is advisable to take a complete backup of your phone for safer side.
  • Ensure that your phone has at least 50-60% charged to prevent the accidental shutdown in-between the process.

Firmware Information –

  • Device – Honor View 10
  • Model – BKL-L09
  • Android Version – 9.0
  • EMUI Version – 9.0
  • Firmware – B108
  • Build Number – BKL-L09C432E4R1P8B108-log (9.0.0.108)
  • Region – Europe
  • Status – Official
  • Type – Full firmware image
  • Changes – Changelog

Download Honor View 10 Android 9 Pie Firmware

1) EMUI 9.0 For Honor View 10

How to Install Android 9 Pie on Honor View 10 –

  • First Download EMUI 9 Flashing TOOL v0.2 and extract it on your PC – Download (Source)
  • Download the firmware for your device from above and save the file inside the flashing tool
  • Now enable OEM Unlocking and USB debugging on your device.
  • Connect your device to PC.
  • Now run FLASH.bat to Install Android 9 Pie based EMUI 9 on Honor View 10.
  • Done

Try HuRupdate Method if above method won’t work – Update Honor View 10 to EMUI 9.0 using HuRUpdater

This the easiest way to Install Android 9 Pie on Honor View 10 (EMUI 9 for Honor View 10). Comment below if you have any doubts. Stay connected with us via FacebookTwitter, and Google Plus to read more such helpful posts.

The post Install Android 9 Pie on Honor View 10 (EMUI 9 for Honor View 10) appeared first on STechGuide.


Install Android 9 Pie on Huawei Mate 10 Pro (EMUI 9 for Huawei Mate 10 Pro)

$
0
0

Good news for Mate 10 pro users, Android 9 Pie Beta update for Huawei Mate 10 Pro is now available. The EMUI 9.0 beta rollout has already begun and you can sign up for Huawei Beta Program but not everyone gets the updates. That’s why we share a guide to Download and Install Android 9 Pie on Huawei Mate 10 Pro (EMUI 9 for Huawei Mate 10 Pro).

The Android Pie for Huawei Mate 10 Pro brings EMUI 9 and brings all Android Pie features. Here we shared Huawei Mate 10 Pro Android Pie firmware files and method to update Huawei Mate 10 Pro to Android 9 Pie. The update is available for Huawei Mate 10 Pro variants (BLA-L09/BLA-L29). Download EMUI 9.0 for Huawei Mate 10 Pro from below.

Install Android 9 Pie on Huawei Mate 10 Pro (EMUI 9 for Huawei Mate 10 Pro)

There is two method to get Android Pie on your device either install Android Pie OTA Updates or Download Android 9 Pie Firmware for Huawei Mate 10 Pro and flash it manually. If you want to install it via OTA then you have to wait for more time and if you want to install it manually then download Android 9 Pie Firmware for Huawei Mate 10 Pro from below. Follow below guide to Download and Install Android 9 Pie on Huawei Mate 10 Pro.

Note – 

  • This method will work only on Huawei Mate 10 Pro.
  • You need an Unlocked bootloader and Rooted device.
  • The method we share is not the official one so try it at your own risk.
  • Follow the steps correctly otherwise you may brick your device. We are not responsible for any damage to your phone.
  • It may erase your data so it is advisable to take a complete backup of your phone for safer side.
  • Ensure that your phone has at least 50-60% charged to prevent the accidental shutdown in-between the process.

Firmware Information –

  • Device – Huawei Mate 10 Pro
  • Model – BLA-L09/BLA-L29
  • Android Version – 9.0
  • EMUI Version – 9.0
  • Firmware – B108
  • Build Number – BLA-L09C432E4R1P8B108-log (9.0.0.108)/BLA-L29C432E4R1P8B108-log (9.0.0.108)
  • Region – Europe
  • Status – Official
  • Type – Full firmware image
  • Changes – Changelog

Download Huawei Mate 10 Pro Android 9 Pie Firmware

1) EMUI 9.0 For Huawei Mate 10 Pro BLA-L09

2) EMUI 9.0 For Huawei Mate 10 Pro BLA-L29

How to Install Android 9 Pie on Huawei Mate 10 Pro –

  • First Download EMUI 9 Flashing TOOL v0.2 and extract it on your PC – Download (Source)
  • Download the firmware for your device from above and save the file inside the flashing tool
  • Now enable OEM Unlocking and USB debugging on your device.
  • Connect your device to PC.
  • Now run FLASH.bat to Install Android 9 Pie based EMUI 9 on Huawei Mate 10 Pro.
  • Done

Try HuRupdate Method if above method won’t work – Update Huawei Mate 10 Pro to EMUI 9.0 using HuRUpdater

This the easiest way to Install Android 9 Pie on Huawei Mate 10 Pro (EMUI 9 for Huawei Mate 10 Pro). Comment below if you have any doubts. Stay connected with us via FacebookTwitter, and Google Plus to read more such helpful posts.

The post Install Android 9 Pie on Huawei Mate 10 Pro (EMUI 9 for Huawei Mate 10 Pro) appeared first on STechGuide.

Download Huawei Mate 10 Android 9 Pie Firmware (EMUI 9.0 Update)

$
0
0

Good news for Mate 10 users, Android 9 Pie Beta update for Huawei Mate 10 is now available. The Mate 10 EMUI 9.0 beta rollout has already begun and you can sign up for Huawei Beta Program but not everyone gets the updates. That’s why we share a link to Download Huawei Mate 10 Android 9 Pie Firmware with that you can Update Mate 10 to EMUI 9.0.

The Android Pie for Huawei Mate 10 brings EMUI 9 and brings all Android Pie features. Here we shared Huawei Mate 10 Android Pie firmware files and method to update Huawei Mate 10 to Android 9 Pie. The update is available for Huawei Mate 10 variants (ALP-L09). Download EMUI 9.0 for Huawei Mate 10 from below.

Download Huawei Mate 10 Android 9 Pie Firmware (EMUI 9.0 Update)

There is two method to get Android Pie on your device either install Android Pie OTA Updates or Download Android 9 Pie Firmware for Mate 10 and flash it manually. If you want to install it via OTA then you have to wait for more time and if you want to install it manually then Huawei Mate 10 Android 9 Pie Firmware from below. Follow below guide to Download and Install Android 9 Pie on Huawei Mate 10.

Note – 

  • This method will work only on Huawei Mate 10.
  • You need an Unlocked bootloader and Rooted device.
  • The method we share is not the official one so try it at your own risk.
  • Follow the steps correctly otherwise you may brick your device. We are not responsible for any damage to your phone.
  • It may erase your data so it is advisable to take a complete backup of your phone for safer side.
  • Ensure that your phone has at least 50-60% charged to prevent the accidental shutdown in-between the process.

Firmware Information –

  • Device – Huawei Mate 10
  • Model – ALP-L09
  • Android Version – 9.0
  • EMUI Version – 9.0
  • Firmware – B047
  • Build Number – ALP-L09C432E3R1P8B47-SP10log (9.0.0.47)
  • Region – Europe
  • Status – Official
  • Type – Full firmware image
  • Changes – Changelog

Download Huawei Mate 10 Android 9 Pie Firmware

1) EMUI 9.0 For Huawei Mate 10 ALP-L09

How to Install Android 9 Pie on Huawei Mate 10 –

  • First Download EMUI 9 Flashing TOOL v0.2 and extract it on your PC – Download (Source)
  • Download the firmware for your device from above and save the file inside the flashing tool
  • Now enable OEM Unlocking and USB debugging on your device.
  • Connect your device to PC.
  • Now run FLASH.bat to Install Android 9 Pie based EMUI 9 on Huawei Mate 10.
  • Done

Try HuRupdate Method if above method won’t work – Update Huawei Mate 10 to EMUI 9.0 using HuRUpdater

This the easiest way to Download Huawei Mate 10 Android 9 Pie Firmware and Update Mate 10 to EMUI 9.0. Comment below if you have any doubts. Stay connected with us via FacebookTwitter, and Google Plus to read more such helpful posts.

The post Download Huawei Mate 10 Android 9 Pie Firmware (EMUI 9.0 Update) appeared first on STechGuide.

Download MIUI 9.6.2.0 Global Stable ROM for Redmi 4 Prime

$
0
0

Good news for Redmi 4 Prime users, latest MIUI 9.6 Global Stable ROM for Redmi 4 Prime starts rolling out. The new MIUI 9 features include Image Search, Smart Assistant, Smart App Launcher, and Performance Enhancements. MIUI 9.6.2.0 Update for Redmi 4 Prime is out and you can install it manually. Follow the below guide to Download MIUI 9.6.2.0 Global Stable ROM for Redmi 4 Prime.

MIUI 9.6 update for Redmi 4 Prime rolling out via OTA and users will get the update soon. You can wait for the OTA or download MIUI 9.6.2.0 for Redmi 4 Prime from below to update manually. Download MIUI 9.6.2.0 Global Stable ROM for Redmi 4 Prime from below.

Download MIUI 9.6.2.0 Global Stable ROM for Redmi 4 Prime

The new update is MIUI 9.6.2.0 MBEMIFD and rolled out via OTA (over-the-air), and users will receive the Notification pop up once the update is ready for download and install. You can Download Redmi 4 Prime MIUI 9.6.2.0 MBEMIFD ROM from below and also manually check for the update by going to Settings -> About Phone -> System updates -> Check for update. Download MIUI 9.6.2.0 Stable ROM for Redmi 4 Prime from below.

Download MIUI 9.6.2.0 Global Stable ROM for Redmi 4 Prime

  • MIUI 9.6.2.0 Global Stable ROM for Redmi 4 Prime – Recovery ROM
  • MIUI 9.6.2.0 Global Stable ROM for Redmi 4 Prime – Fastboot ROM

How to Install MIUI 9.6.2.0 Global Stable ROM on Redmi 4 Prime –

To install MIUI 9.6.2.0 update for Redmi 4 Prime download either Recovery ROM or Fastboot ROM from above and use the below method to install this on your device.

Install MIUI 9.6.2.0 on Redmi 4 Prime (Recovery and Fastboot)

Download MIUI 9.6.2.0 Global Stable ROM for Redmi 4 Prime and flash it. Comment below if you have any doubts. Stay connected with us via FacebookTwitter, and Google Plus to read more such helpful posts.

The post Download MIUI 9.6.2.0 Global Stable ROM for Redmi 4 Prime appeared first on STechGuide.

Download Nokia 7 Plus Android 9 Pie Stable OTA Update (build V3.22C)

$
0
0

After releasing four Beta’s (Developer Preview), Nokia 7 Plus finally rolling out the Android 9 Pie Stable Update. The Stable Pie update for Nokia 7 Plus comes with build number 3.22C and bring the September 2018 security patch. Follow below guide to Download Nokia 7 Plus Android 9 Pie Stable OTA Update and install it manually.

The Nokia 7 Plus Stable Android 9 Pie features a new Digital Wellbeing dashboard, gesture-based navigation system,  AI-enhanced improvements to the UI, Recent App Switcher, new Adaptive features (adaptive battery and brightness), along with September 2018 security patch. Download Nokia 7 Plus Android 9 Pie Stable OTA Update from below.

Download Nokia 7 Plus Android 9 Pie Stable OTA Update (build V3.22C)

There is two method to get Android Pie on your device either install Android Pie OTA Updates or Download the Android Pie OTA and flash it manually. If you’re already using the Android P build on your Nokia 7 Plus, you can grab the OTA file and sideload it without deleting your data. Follow below guide to Download and Install Stable Android 9 Pie OTA on Nokia 7 Plus.

Download Nokia 7 Plus Android 9 Pie Stable OTA Update

  • Download Stable Android 9.0 Pie OTA v3.22c for Nokia 7 Plus – Download

Note – 

  • This method will work only on Nokia 7 Plus (TA-1046 or TA-1055) variants.
  • Below method is not tested so do it at your own risk. We are not responsible for any damage to your phone.
  • Follow the steps correctly otherwise you may brick your device.
  • It may erase your data so it is advisable to take a complete backup of your phone for safer side.
  • Ensure that your phone has at least 50-60% charged to prevent the accidental shutdown in-between the process.

How to Install Stable Android 9 Pie OTA on Nokia 7 Plus –

Method 1 –

  1. Download the OTA zip file from above and save it on your device.
  2. Go to download folder and rename the package to the corresponding zip name.
    Example: B2N-322C-0-00WW-B01-update.zip
  3. Place it to the root directory of internal storage.
  4. Open Phone App and dial *#*#874#*#* to update.
  5. Wait for the update to finish and restart when prompted.

Method 2 –

  1. Enable USB debugging option from setting>developer option>. To enable Developer Options, go to About phone and tap the Build Number 7 times.
  2. Download ADB and fastboot driver for windows or ADB and Fastboot for Mac and install it on your PC.
  3. Download the Nokia 7 Plus Android Pie Beta 4 zip from above Copy ROM to a folder where adb installed.
  4. Now Turn Off your phone and boot into recovery mode.
  5. Choose Apply update from ADB
  6. Now Connect your phone to Laptop/PC
  7. On Marshmallow ROM folder press shift+right click and click on open command here.
  8. Now check your connection by typing the below command
    adb devices
    if your device is listed, you’re ready to flash the ROM
  9. Flash the Android Pie OTA Zip on Nokia 7 Plus by typing below command
    adb sideload File-Name.zip 
  10. Now wait until the process complete and then Reboot the phone.
  11. Done!

So this the complete guide to Download Nokia 7 Plus Android 9 Pie Stable OTA Update (build V3.22C) and install it manuallyIf you have any doubts comments below.

The post Download Nokia 7 Plus Android 9 Pie Stable OTA Update (build V3.22C) appeared first on STechGuide.

Download Essential Phone October 2018 Security Update

$
0
0

Here we share a link to Download Essential Phone October 2018 Security Update. The update is a stable Android Pie build and rolling out via OTA. The Stable Pie update PPR1.181005.034 for Essential Phone bring back Notch setting and comes with October Security Patch.  Download Essential Phone October 2018 Security Update from below.

The Essential Phone  OTA update features all Android 9 Pie features along with the Notch setting and October Security Patch. Download Essential Phone Stable Android 9 Pie Factory Image and OTA from below.

 Download Essential Phone October 2018 Security Update

There is two method to get PPR1.181005.034 OTA on Essential Phone either install Android Pie OTA Updates or Download the Factory Images of Android Pie and flash it manually. If you’re already using the Android Pie build on your Essential Phone, you can grab the OTA file and sideload it without deleting your data. The Android 9 Pie Factory images or OTA for Essential Phone will install over top of whatever you’re running, and they do delete everything by default. Download Essential Phone October 2018 Security Update from below.

 Download Essential Phone October 2018 Security Update

  • Download Essential Phone Android 9 Pie Factory vPPR1.181005.034 – Download
  • Download Essential Phone PPR1.181005.034 OTA– Download

Note – 

  • This Firmware file is only for Essential Phone PH-1. Don’t try this on any other device.
  • Follow the method correctly otherwise you may brick your device. We are not responsible for any damage to your phone.
  • Make sure ADB and Fastboot driver installed (Check out How to setup ADB and Fastboot on windows and Setup ADB and Fastboot on Mac)
  • Installing Android Pie System image on Essential Phone will delete all your data so take Complete Backup of your Device before proceeding.
  • Ensure that your phone has at least 50-60% charged to prevent the accidental shutdown in-between the process.

How to Install Stable Android 9 Pie on Essential Phone –

Install Essential Phone PPR1.181005.034 Factory Image

Step 1 – Unlock Bootloader

1) First enable ‘USB debugging’ and ‘OEM Unlock’ option from setting>developer option>. To enable Developer Options, go to About phone and tap the Build Number 7 times.

2) Go to ADB  installation directory and press and hold ‘shift’ key and right-clicked anywhere in the folder and select ‘Open command window here’.

3) Now connect your device to PC and enter into the fastboot mode.

adb reboot bootloader

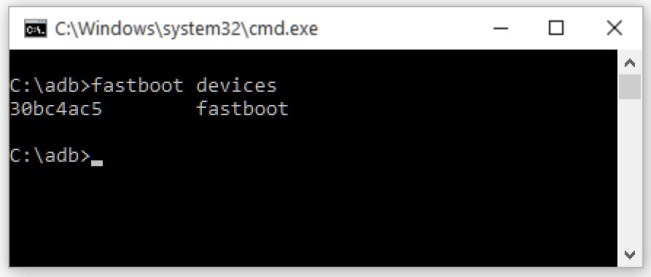
4) You are in Fastboot mode now to check your connection by entering below command in command prompt.

fastboot devices

5) To unlock bootloader of Essential Phone on Android Pie, go to the command line and type below command. It will only take seconds to complete the process.

fastboot flashing unlock

6) Now your device will reboot into bootloader mode.

Step -2 – Flashing Android Pie Factory Image on Essential Phone

1) Download the Essential Phone Android Pie factory image for your device and unzip it.

2) Connect your device to the PC over USB and Enable USB Debugging option from setting>developer option>.

USB debugging

3) Now connect your device to PC and enter into the fastboot mode. To enter in fastboot mode press and hold ‘Volume Down + Power’ button or by typing “adb reboot bootloader

4) Open the command prompt and navigate to the unzipped system image directory.

5) Now Execute the “flash-all.bat“, it will unzip the image files and install the necessary bootloader, baseband firmware(s), and operating system. The step will install Android Pie system image on Essential Phone.

6) Done

Install PPR1.181005.034 OTA on Essential Phone

1) Enable ‘USB debugging’ option from setting>developer option>. To enable Developer Options, go to About phone and tap the Build Number 7 times.

3) Download ADB and fastboot driver for windows or ADB and Fastboot for Mac and install it on your PC.

4) Download Android Pie OTA for Essential Phone from above Copy ROM to a folder where adb installed.

5) Now Turn Off your phone and boot into recovery mode.

3) Choose Apply Update from ADB

4) Now Connect your phone to Laptop/PC

5) On ADB folder press shift+right click and click on open command here.

6) Now check your connection by typing the below command

adb devices

if your device is listed, you’re ready to flash the ROM

7) Flash the Pie OTA on your Essential Phone by typing below command

adb sideload File Name.zip

8) Now wait until the process complete and then Reboot the phone.

9) Done!

So this the complete guide to Download and Install Android 9 Pie on Essential PhoneIf you have any doubts comments below.

The post Download Essential Phone October 2018 Security Update appeared first on STechGuide.

Viewing all 3322 articles
Browse latest View live